Dynamics GP Utilities are used to perform global administrative tasks such as:
Completing the Dynamics GP installation, which includes:
Creation of the DYNAMICS SQL Server database:
DYNAMICS is also referred to as the system
database for Dynamics GP. It holds all the global data, including
users, security, company setup, currency setup, and exchange rates.
Creation of the DYNSA user: DYNSA is a SQL Server login created by Dynamics GP and set to be the database owner of all the Dynamics GP databases.
Creation of the DYNGRP and DYNWORKFLOWGRP SQL Server roles:
Security for the Dynamics GP application is set inside the application
itself, not in SQL Server. Typically, no SQL Server permissions are
needed for the individual Dynamics GP users, all permissions are granted
to the DYNGRP role and Dynamics GP users are added to the DYNGRP role
when they are created by the application.
Defining the account framework.
Setting passwords for DYNSA, Dynamics GP system, and (optionally) Lesson Users.
Creating new companies. Performing upgrades. Loading and reloading the sample Dynamics GP company data. Setting various system options. Synchronizing the Dynamics GP application on workstations to the server setup.
In the following sections, we
will go over the steps needed to complete the Dynamics GP installation,
load the sample company, and create a new company.
Completing the Dynamics GP installation
The next step in the
Dynamics GP installation is to run Dynamics GP Utilities to create the
account framework and the necessary SQL Server components. Follow these
steps to continue your Dynamics GP installation:
1. Launch Dynamics GP Utilities by navigating to Start | All Programs | Microsoft Dynamics | GP 2010 | GP Utilities. 2. If you are prompted to include New Code, choose Yes.
Whether you are prompted for this depends on what media you used during
installation, and whether or not you have installed a Dynamics GP
service pack. 3. Choose your ODBC Data Source Name (DSN) under Server, enter sa for the User ID and type in the sa
Password. Click OK.
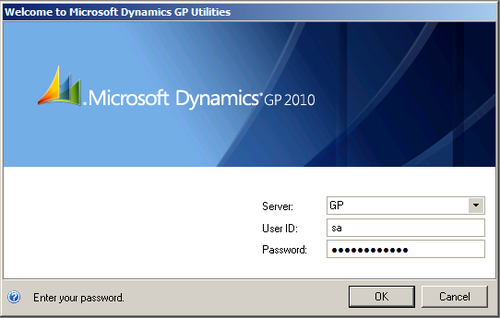
4. The Welcome to Microsoft Dynamics GP Utilities window will open, click Next. 5. The Installation Options window will let you know that the Microsoft Dynamics GP system database (called DYNAMICS in SQL Server) has not been created yet and will ask you to choose an installation option:
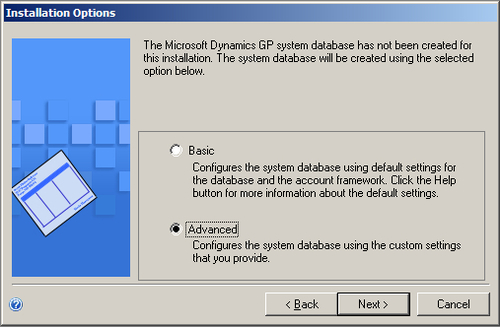
Using the Basic option is not
recommended. One of the key disadvantages of the Basic option is that it
will not let you select your own account framework. For the Basic
installation option, the account framework will have five maximum
segments of nine characters each and no sorting options. The Basic
option will also not allow changes to the locations of the database
files and will leave the Dynamics GP system password blank. Choose Advanced and click Next.
6. On the Database Setup window you can change the location of the SQL Server database files:

Note that you cannot change
the physical file names, they will be GPSDYNAMICSDat.mdf and
GPSDYNAMICSLog.ldf. If you decide to change the locations of the files,
the locations have to already exist. After making any desired changes,
click Next.
7. On the Set Up Account Framework
window, enter what you have decided to use for the General Ledger
account framework. The following illustrates the typical settings for the account framework:
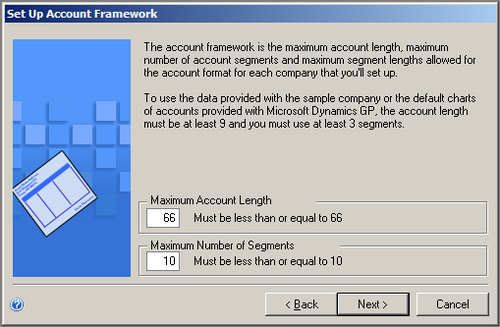
Rememb er that these will be
the maximum values allowed for General Ledger accounts in any Dynamics
GP company you create in the future. Click Next to continue.
8. Having selected 66 and 10 for the maximums on the previous window will result in 10 segments each with a maximum length of 6 on the Set Up Account Segment Lengths window:
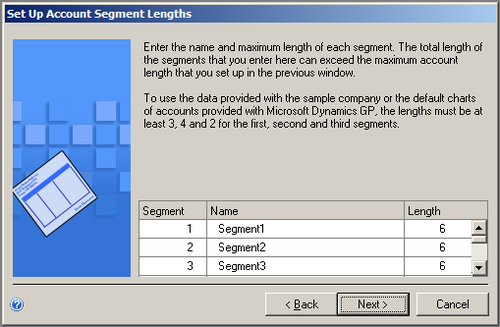
Scroll through the list and make any changes desired, then click Next.
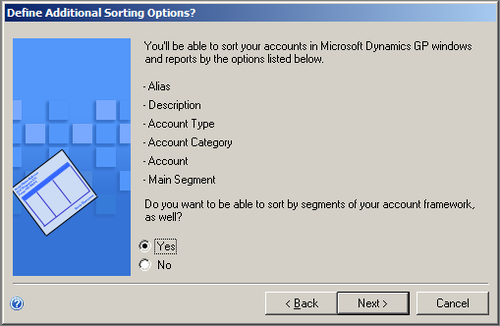
9.
Additional sorting options allow users in Dynamics GP to sort, create
reports, individually display, and search by each account segment for
which a sorting option exists. It is recommended to create a sorting
option for each account segment in your account framework.
On the Define Additional Sorting Options? window select Yes and click Next:
10. On the Set Up Additional Sorting Options window, add each segment from the Available Segments list on the left to the Selected Sorting Options list on the right. When you are done, it will look similar to this:
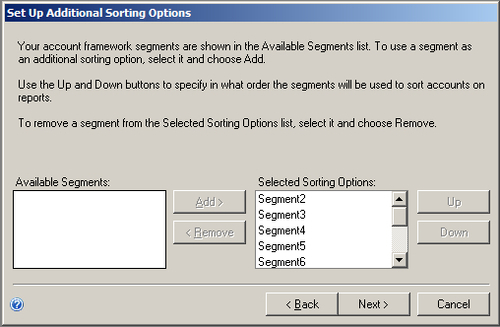
The sorting options are not
something that can be changed at a later date, so it is important to
set them correctly during the installation. Click Next to continue to
the Verify Account Framework window. This will recap what you have
entered on the previous windows. If everything is correct, click Next.
11. On the Enter DYNSA User Password window, enter and confirm a password for the DYNSA user. A password for DYNSA is required. 12. On the Enter System Password window, enter and confirm a system password
for Dynamics GP. This password will be used in the Dynamics GP
application to restrict access to system setup windows. While a blank
password is allowed here, it is highly discouraged as it will leave your
Dynamics GP system settings open to all Dynamics GP users. Some notes
and recommendations for the Dynamics GP system password are as follows:
a.
Do not make the system password the same as your sa or DYNSA password.
There may be times when you want users to have one of these passwords,
but not the others. As it is sometimes confusing to users which password
they are being asked for, they may inadvertently know a password they
should not and gain access to areas they should not see if these
passwords are the same. b.
The system password can be changed at any time from the Dynamics GP
user interface. (Knowledge of the current password is required.) c.
Consider leaving the system password blank while setting up the system
prior to allowing users in. This is typically when you will need to
enter the system setup windows often, so you can save yourself some time
by doing this.
Click Next to continue. 13. The settings you have chosen will be listed on the Confirmation window. You can use Ctrl+A to select all the settings shown, Crtl+C to copy them, and Ctrl+V to paste them somewhere else if you would like to print or save these for the future. Click Back if you need to change anything, click Finish to continue. 14. The Server Installation Progress window will list all the steps in the creation of the DYNAMICS database and show you the progress.
15. After the DYNAMICS database is created, the Additional Tasks window will open with options for creating a company, loading the sample company data, and other settings.
Once the Dynamics GP system database is in place you can load the sample company and create your own Dynamics GP companies.
|